One festive tradition that seems to have snowballed in recent years is advent calendars. Advent calendars of my childhood cost £1 max, had a tiny morsel of cheap chocolate in a questionable shape and the excitement of opening a new door each day was the whole point of December. And they were great!
Nowadays they are an industry in themselves with every shop bringing out their own luxury versions from beauty to gins, teas and even curry powders. It’s feeling all a bit too commercial and I’m craving the simplicity of an advent calendar of yesteryears.
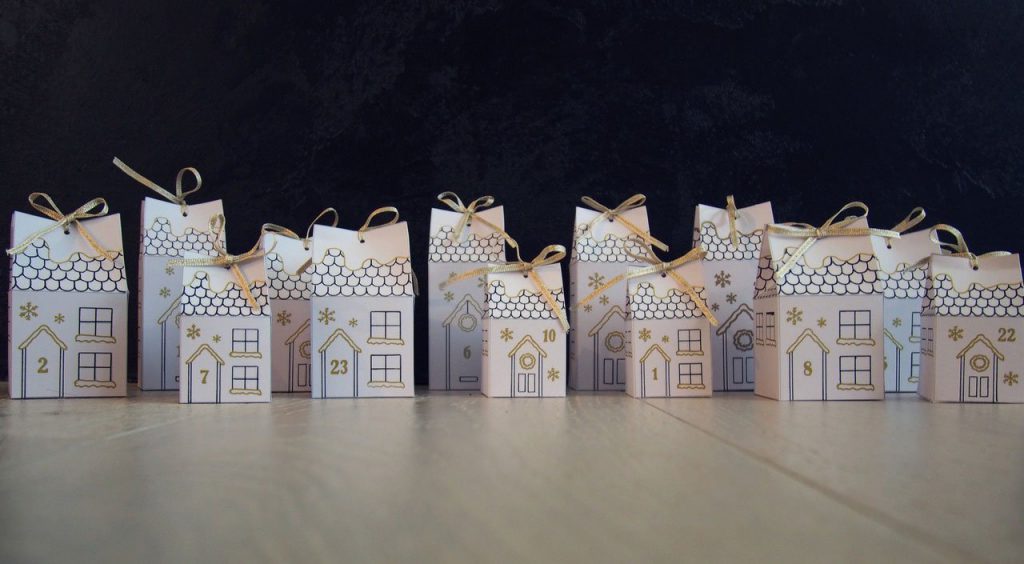
Now we may be a removals company, but we have a creative spirit and this cracking little DIY advent calendar will help turn your house into a home…and net you some serious brownie points if you fill it for someone else!
To make things super easy just download the free template, print it off, cut it out, colour it in and fill it up! All you need is scissors so this is a great child friendly activity and if you choose the pre-drawn template you don’t even need to be artistic.
You will need:
- 25 sheets of A4 thin card/paper around 150 – 200gsm and any colour you like
- A4 printer
- Scissors
- Ruler
- 1 Roll of double sided tape
- Decorative thread/ribbon
- Coloured pens/pencils etc for decorating (optional)
- Sharp pencil for punching a hole

Step 1: Print
Choose your template from the following options and print off your DIY advent calendar.
Pre-deocrated Template – 25 pre-drawn and numbered templates (no drawing required!)
Blank Template – 3 blank templates of the three different sizes ready for you to add your own designs
Tip: Check the max paper weight your printer can handle. Most shouldn’t have any problem at all with up to 200gsm but good to check first.

Step 2: Decorate
The template is faint so you can draw over the lines and decorate as much or as little as you like. You want to do your decoration while the house is still flat which makes it much easier. You can also leave the templates as they are and choose not to decorate them at all.
Tip: If you want quite a traditional look a white acrylic pen on brown kraft card will look like little gingerbread houses!

Step 3: Cut, Score and punch
Cut around the perimeter line then lightly score all of the internal lines and the two small dotted lines on the snowy roof. This will make assembling it much easier and keep everything neater than just folding it.
Make two holes in the other two snowy roofs about 1cm from the top and in the centre. (If you find it easier you can do this once it’s all assembled and then jab your pencil through both bits of card together.

Step 4: Fold and stick
Apply your double sided tape along the tabs and peel off the backing. Make sure your tape is almost the full length of the tab so there are no open bits when you put the box together.
Fold and stick the two sections with doors on first. Press the card firmly against the tab to get a secure join. Then fold the long tab and secure this against the tab from the base. Finally fold the remaining house wall onto the two tabs. Folding in this order makes it much easier and gives a neater finish.

Step 5: Form the roof
Hold each side of the box in between your thumb and middle finger as shown in the picture. Then use your index fingers to push the dotted lines that you previously scored into the middle until your index fingers are touching. The sides will naturally collapse in and close your roof.

Step 6: Fill them up!
Now the chocoholic in me says fill them with sweet treats but of course you don’t have to. Get creative and switch it up so it’s a real surprise for whoever is opening it. However, here are a few ideas for treats that fit nicely in the boxes…and buy extra as if you’re like me it will be a case of “one for them, one for me”!
Pick n mix
Mini Haribo treat bags
Celebrations/roses/quality streets etc
Lindor
…..you get the idea. I could go on. My knowledge of the sweetie aisle is extensive!

Step 7: Close and display
Cut your thread/ribbon to approximately 25cm and thread it through your holes to close up your box with a bow. If hanging, the length of your hanging thread will depend on what you are hanging them from but vary the length a little each time so they hang at different heights.
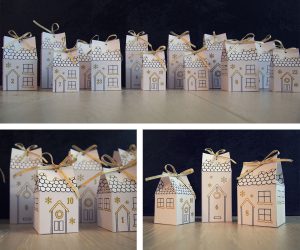
Tip: Hanging form a branch will create a very contemporary Scandi look. For a more traditional feel you can display as an advent village. You could add some fake snow and mini trees to complete the look.
Now, stand back and enjoy your advent calendar and the joy it will bring to a loved one (or yourself!) every day.
Please share this with others and if you are looking for other decorating ideas this festive season why not check out our 9 top tips for ‘WOW’ Christmas decorations on a budget and our ultimate guide for choosing and caring for a real Christmas tree.